
1. 객체지향 프로그래밍과 클래스
#include <iostream>
#include <string>
#include <vector>
using namespace std;
// Friend: name, address, age, height, weight, ...
void print(const string &name, const string &address, const int &age,
const double &height, const double &weight)
{
cout << name << " " << address << " " << age << " " << height << " " << weight << endl;
}
int main()
{
string name;
string address;
int age;
double height;
double weight;
print(name, address, age, height, weight);
vector<string> name_vec;
vector<string> addr_vec;
vector<int> age_vec;
vector<double> height_vec;
vector<double> weight_vec;
print(name_vec[0], addr_vec[0], age_vec[0], height_vec[0], weight_vec[0]);
return 0;
}
#include <iostream>
#include <string>
#include <vector>
using namespace std;
// Object (개념)
// Friend: name, address, age, height, weight, ...
// print()
// Class (구현)
// C++에서는 struct 사용도 OK!
// 단, 일반적으로는 데이터 묶을 때 struct 사용, 기능도 넣을 경우 class 사용
class Friend
{
public: // access specifier (public, private, protected)
string m_name;
string address_;
int _age;
double height;
double weight;
// 같은 멤버이기 때문에 직접 접근할 수가 있음!
void print()
{
cout << m_name << " " << address_ << " " << _age << " " << height << " " << weight << endl;
}
};
void print(const string &name, const string &address, const int &age,
const double &height, const double &weight)
{
cout << name << " " << address << " " << age << " " << height << " " << weight << endl;
}
int main()
{
Friend jj{ "Jack jack", "Uptown", 2, 30, 10 }; // instanciation, instance
//print(jj.name, jj.address, jj.age, jj.height, jj.weight);
//print(jj);
jj.print();
vector<Friend> my_friends;
my_friends.resize(2);
for (auto &e : my_friends)
e.print();
//vector<string> name_vec;
//vector<string> addr_vec;
//vector<int> age_vec;
//vector<double> height_vec;
//vector<double> weight_vec;
//print(name_vec[0], addr_vec[0], age_vec[0], height_vec[0], weight_vec[0]);
return 0;
}
2. 캡슐화, 접근 지정자, 접근 함수
Encapsulation
Access Specifiers
Access Functions
#include <iostream>
#include <string>
#include <vector>
using namespace std;
class Date
{
//public: // access specifier
//private: // 기본 접근 지정자, 접근 시 access function을 만들어 줘야 함
int m_month;
int m_day;
int m_year;
public:
// access function
void setDate(const int& month_input, const int& day_input, const int& year_input)
{
m_month = month_input;
m_day = day_input;
m_year = year_input;
}
// setters
void setMonth(const int& month_input)
{
m_month = month_input;
}
void setDay(const int& day_input)
{
m_day = day_input;
}
void setYear(const int& year_input)
{
m_year = year_input;
}
// getters
const int& getMonth()
{
return m_month;
}
const int& getDay()
{
return m_day;
}
const int& getYear()
{
return m_year;
}
void copyFrom(const Date& original)
{
// 다른 인스턴스지만, 같은 class라면 private라도 접근 가능!
m_month = original.m_month;
m_day = original.m_day;
m_year = original.m_year;
}
};
int main()
{
Date today;// { 8, 4, 2025 };
// std->class 후 바로 접근하려고 하면 error!!
//today.m_month = 8;
//today.m_day = 4;
//today.m_year = 2025;
today.setDate(8, 4, 2025);
today.setMonth(10);
//cout << today.m_day << endl; error!!
cout << today.getDay() << endl;
Date copy;
copy.setDate(today.getMonth(), today.getDay(), today.getYear());
copy.copyFrom(today);
return 0;
}
3. 생성자 Constructors
#include <iostream>
using namespace std;
class Fraction
{
private:
int m_numerator;
int m_denominator;
public:
// 생성자, 반환 타입X class 이름과 같음
// Fraction() 추가 또는 기본값 지정하기!
Fraction(const int& num_in = 1, const int& den_in = 1)
{
m_numerator = num_in;
m_denominator = den_in;
cout << "Fraction() constructor" << endl;
}
void print()
{
cout << m_numerator << " / " << m_denominator << endl;
}
};
int main()
{
// 선언시, 내부적으로 생성자를 먼저 실행시킴, parameter가 없을 경우 () 빼기!
// 생성자가 하나도 없을 때, 아무 일도 하지 않는 디폴트 생성자를 컴파일러가 만듦 Fraction() { }
// 단, 생성자를 하나라도 정의한다면 디폴트 생성자를 생성하지 않음!! 주의
Fraction frac;
frac.print();
Fraction one_thirds(1, 5);
Fraction one_thirds2(1); // 기본값 지정 시 가능
one_thirds.print();
Fraction frac2 = Fraction{ 1,3 }; // 가능하나 권장X
Fraction frac3{ 1, 3 }; // public일 때는 생성자 없이 처리 가능, private시 생성자 없이 불가능, 타입 변환 허용X
Fraction frac4(1, 3);
return 0;
}
#include <iostream>
using namespace std;
class Second
{
public:
Second()
{
cout << "class Second constructor()" << endl;
}
};
class First
{
Second sec;
public:
//private: 말도 안 되나, 사용하는 특별한 경우도 있음 추후 배움
First()
{
cout << "class First constructor()" << endl;
}
};
int main()
{
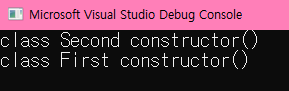
// Second 생성자 -> First 생성자
// 멤버인 Second부터 초기화하기 위해 먼저 생성자 실행, 그 후 First의 생성자 실행
First fir;
return 0;
}

4. 생성자 멤버 초기화 목록
Member Initializer List
#include <iostream>
using namespace std;
class B
{
private:
int m_b;
public:
B(const int& m_b_in)
: m_b(m_b_in)
{}
};
class Something
{
private:
int m_i = 100;
double m_d = 100.0;
char m_c = 'F';
int m_arr[5] = { 100, 200, 300, 400, 500 };
B m_b{ 1024 };
// 생성자가 우선!
public:
Something()
: m_i(1), m_d(3.14), m_c('a'), m_arr{ 1, 2, 3, 4, 5 }, m_b(m_i - 1)
//: m_i{ 1 }, m_d{ 3.14 }, m_c{ 'a' } // casting 불가능
{
/*m_i = 1;
m_d = 3.14;
m_c = 'a';*/
// 생성자 안에서 다시 값 변경 가능
m_i *= 3;
m_d *= 3.0;
m_c += 3;
}
void print()
{
cout << m_i << " " << m_d << " " << m_c << endl;
for (auto& e : m_arr)
cout << e << " ";
cout << endl;
}
};
int main()
{
Something som;
som.print();
return 0;
}
5. 위임 생성자
Delegating Constructors: 생성자가 다른 생성자를 사용하는 것
#include <iostream>
#include <string>
using namespace std;
class Student
{
private:
int m_id;
string m_name;
public:
// 어떠한 기능을 하는 코드는 한 군데서만!
Student(const string& name_in)
// : m_id(0), m_name(name_in)
: Student(0, name_in)
{
//init(id_in, name_in);
}
Student(const int& id_in, const string& name_in)
: m_id(id_in), m_name(name_in)
{
//init(id_in, name_in);
}
// 초기화 코드를 분리하는 경우도 있음!
void init(const int& id_in, const string& name_in)
{
m_id = id_in;
m_name = name_in;
}
void print()
{
cout << m_id << " " << m_name << endl;
}
};
int main()
{
Student st1(0, "Jack Jack");
st1.print();
Student st2("Dash");
st2.print();
return 0;
}
6. 소멸자 destructor
변수가 영역을 벗어나서 사라질 때(instance가 메모리에서 해제될 때) 자동으로 호출되는 함수
동적할당의 경우, 영역을 벗어나도 자동으로 메모리가 해제되지 않기 때문에 delete할 때만 호출됨, 직접 소멸자 호출은 권장X
#include <iostream>
using namespace std;
class Simple
{
private:
int m_id;
public:
Simple(const int& id_in)
: m_id(id_in)
{
cout << "Constructor " << m_id << endl;
}
~Simple() // no parameter
{
cout << "Destructor " << m_id << endl;
}
};
int main()
{
//Simple s1(0);
Simple *s1 = new Simple(0);
Simple s2(1);
delete s1;
return 0;
}
#include <iostream>
using namespace std;
class IntArray
{
private:
int *m_arr = nullptr; // vector
int m_length = 0;
public:
IntArray(const int length_in)
{
m_length = length_in;
m_arr = new int[m_length]; // 동적 할당
cout << "Constructor" << endl;
}
~IntArray()
{
if(m_arr != nullptr) delete[] m_arr;
}
int getLength()
{
return m_length;
}
};
int main()
{
while (true)
{
IntArray my_int_arr(10000);
}
return 0;
}
7. this 포인터와 연쇄 호출
#include <iostream>
using namespace std;
class Simple
{
private:
int m_id;
public:
Simple(int id)
{
// this: 현재 이 주소를 갖고 있는 인스턴스, 여기서는 생략 가능
this->setID(id);
this->m_id;
// 자기 자신의 주소를 출력
cout << this << endl;
}
// 인스턴스가 추가될 때마다 함수를 생성하는 것이 아닌, 모든 인스턴스가 공유하여 사용
// Simple::setID()가 어딘가에 저장되어 있고, Simple::setID(&s1, 2); 이런 식으로 작동함
void setID(int id) { m_id = id; }
int getID() { return m_id; }
};
int main()
{
Simple s1(1), s2(2);
s1.setID(2);
s2.setID(4); // == Simple::setID(&s2, 4); 문법적으로는 허용X
cout << &s1 << " " << &s2 << endl;
return 0;
}#include <iostream>
using namespace std;
class Calc
{
private:
int m_value;
public:
Calc(int init_value)
: m_value(init_value)
{}
Calc& add(int value) { m_value += value; return *this; }
Calc& sub(int value) { m_value -= value; return *this; }
Calc& mult(int value) { m_value *= value; return *this; }
void print()
{
cout << m_value << endl;
}
};
int main()
{
Calc cal(10);
/*cal.add(10);
cal.sub(1);
cal.mult(2);
cal.print();*/
// member-function chaining
// C++에서의 실용성은 글쎄요...
cal.add(10).sub(1).mult(2).print();
Calc &temp1 = cal.add(10);
Calc &temp2 = temp1.sub(1);
Calc &temp3 = temp2.mult(2);
return 0;
}
8. 클래스 코드와 헤더 파일
함수 이름 우클릭 - Quick Actions and Refactorings... - Move Definition Location

Calc.h
#pragma once
#include <iostream>
// 헤더파일에서 using namespace를 사용하게 되면 include하는 것들이
// 전부 영향을 받기 때문에 사용하지 않는 게 좋음!!
class Calc
{
private:
int m_value;
public:
Calc(int init_value);
Calc& add(int value);
Calc& sub(int value);
Calc& mult(int value);
void print();
};
Calc.cpp
#include "Calc.h"
using namespace std;
Calc::Calc(int init_value)
: m_value(init_value)
{}
// Calc라는 클래스의 멤버 add
Calc& Calc::add(int value)
{
m_value += value;
return *this;
}
Calc& Calc::sub(int value)
{
m_value -= value;
return *this;
}
Calc & Calc::mult(int value)
{
m_value *= value;
return *this;
}
void Calc::print()
{
cout << m_value << endl;
}
#include "Calc.h"
int main()
{
Calc(10).add(10).sub(1).mult(2).print(); // 이것도 가능
return 0;
}
9. 클래스와 const
#include <iostream>
using namespace std;
class Something
{
public:
int m_value = 0;
Something(const Something& st_in)
{
m_value = st_in.m_value;
cout << "Copy Constructor" << endl;
}
Something()
{
cout << "Constructor" << endl;
}
void setValue(int value) //const error!
{
m_value = value;
}
//int getValue() { return m_value; }
int getValue() const
{
// 이 member function은 const다 = 내부에서 값을 바꾸지 않는다
// const로 사용할 수 있는 건 const로 막아 두는 것이 좋음! debugging 유용
return m_value;
}
};
void print(const Something &st)
{
// 복사되는 게 맞으나, default copy constuctor가 숨어 있음
// const & 사용하면 복사 진행X -> 효율적임
cout << &st << endl;
cout << st.getValue() << endl;
}
int main()
{
const int i = 0;
//i = 1; //error!
// 인스턴스를 const로 선언한다는 것은 클래스 내 변수를 const로 선언하는 것과 같은 효과
const Something something;
//something.setValue(3); //error!
cout << something.getValue() << endl;
Something something2;
print(something2);
return 0;
}
#include <iostream>
#include <string>
using namespace std;
class Something
{
public:
string m_value = "default";
// const 유무에 따라서도 overloading 가능!!
const string& getValue() const
{
cout << "const version" << endl;
return m_value;
}
string& getValue()
{
cout << "non-const version" << endl;
return m_value;
}
};
int main()
{
Something something;
something.getValue();
something.getValue() = 10;
const Something something2;
something2.getValue();
//something2.getValue() = 1004; //error!
return 0;
}
10. 정적(static) 멤버 변수
#include <iostream>
using namespace std;
int generateID()
{
static int s_id = 0;
return ++s_id;
}
class Something
{
public:
//static int m_value = 1; // error!
// a static data member with an in-class initializer must have non-volatile const integral type or be specified as 'inline'
// static은 initialize 할 수 없음
static int s_value;
static const int s_value2 = 1; // static const인 경우 바로 초기화
static constexpr int s_value3 = 1; // constexpr: 컴파일 타임에 값이 결정되어야 함, 싱글톤
};
int Something::s_value = 1; // define in cpp
//int Something::s_value2 = 1; // error!
int main()
{
// 호출될 때마다 s_id 증가
cout << generateID() << endl;
cout << generateID() << endl;
cout << generateID() << endl;
// Something 변수 선언 전에도 존재함!
cout << &Something::s_value << " " << Something::s_value << endl;
Something st1;
Something st2;
st1.s_value = 2;
cout << &st1.s_value << " " << st1.s_value << endl;
cout << &st2.s_value << " " << st2.s_value << endl;
Something::s_value = 1024;
cout << &Something::s_value << " " << Something::s_value << endl;
return 0;
}
11. 정적 멤버 함수
#include <iostream>
using namespace std;
class Something
{
public:
// inner class
// class 내에서 static 변수를 초기화하는 것처럼 구현할 수 있음
class _init
{
public:
_init()
{
s_value = 9876;
}
};
private:
static int s_value;
int m_value;
static _init s_initializer;
public:
Something()
: m_value(123)//, s_value(1024) // error! static 생성자 지원X
{
}
static int getValue()
{
//return this->s_value; //error! nonstatic function에서만 가능
//return m_value; //error! this로 접근해야 하는 모든 것 불가능
return s_value;
}
int temp()
{
// this: 특정 인스턴스의 그 멤버 값을 사용하겠다
return this->s_value;
}
};
int Something::s_value = 1024;
Something::_init Something::s_initializer;
int main()
{
// 인스턴스 정의 전, static 멤버 변수 접근 가능
// private라고 하면 접근 불가능!! => static 함수 호출
//cout << Something::s_value << endl;
cout << Something::getValue() << endl;
Something s1, s2;
cout << s1.getValue() << endl;
//cout << s1.s_value << endl;
// member function pointer
// 함수는 주소가 같음! s1에 따로, s2에 따로가 아니라 Something의 temp가 하나 있고,
// s1에 있는 걸 가지고 이 함수를 실행시켜라!
//int (Something::*fpr1)() = &s1.temp;
int (Something::*fptr1)() = &Something::temp;
//s2.*fptr1 => s2라는 인스턴스의 포인터를 넘겨 주고, temp가 작동하는 형태
cout << (s2.*fptr1)() << endl;
// 인스턴스와 관계 없이 실행시킬 수 있음
int (*fptr2)() = &Something::getValue;
cout << fptr2() << endl;
return 0;
}
12. 친구 함수와 클래스 friend
#include <iostream>
using namespace std;
class B; // forward declaration class B라는 게 있다, 넘어가라
class A
{
private:
int m_value = 1;
friend void doSomething(A& a, B& b);
};
class B
{
private:
int m_value = 2;
friend void doSomething(A& a, B& b);
};
void doSomething(A& a, B& b)
{
cout << a.m_value << " " << b.m_value << endl;
}
int main()
{
A a;
B b;
doSomething(a, b);
return 0;
}
#include <iostream>
using namespace std;
class B;
class A
{
private:
int m_value = 1;
friend class B;
};
class B
{
private:
int m_value = 2;
public:
void doSomething(A& a)
{
cout << a.m_value << endl;
}
};
int main()
{
A a;
B b;
b.doSomething(a);
return 0;
}
#include <iostream>
using namespace std;
class A;
class B
{
private:
int m_value = 2;
public:
void doSomething(A& a);
};
class A
{
private:
int m_value = 1;
friend void B::doSomething(A& a);
};
// 선언과 정의를 분리함
void B::doSomething(A& a)
{
cout << a.m_value << endl;
}
int main()
{
A a;
B b;
b.doSomething(a);
return 0;
}
13. 익명 객체
한 번만 사용되고 사라져 버림!
#include <iostream>
using namespace std;
class A
{
public:
int m_value;
A(const int& input)
: m_value(input)
{
cout << "Constructor" << endl;
}
~A()
{
cout << "Destructor" << endl;
}
void print()
{
cout << m_value << endl;
}
void printDouble()
{
cout << m_value * 2 << endl;
}
};
int main()
{
A a(1);
a.print();
a.printDouble();
cout << endl;
// R-value처럼 작동
A(1).printDouble();
A(2).printDouble();
return 0;
}
#include <iostream>
using namespace std;
class Cents
{
private:
int m_cents;
public:
Cents(int cents) { m_cents = cents; }
int getCents() const { return m_cents; }
};
Cents add(const Cents &c1, const Cents &c2)
{
return Cents(c1.getCents() + c2.getCents());
}
int main()
{
// 유사성?
cout << add(Cents(6), Cents(8)).getCents() << endl;
cout << int(6) + int(8) << endl;
return 0;
}
14. 클래스 안에 포함된 자료형 nested types
여러 클래스가 함께 사용하는 게 아니라, 특정 클래스에서만 사용된다면 내부에 임시로 사용할 수 있게 만드는 것도 좋은 방법임
#include <iostream>
using namespace std;
/*
enum FruitType
{
APPLE, BANANA, CHERRY,
};
*/
class Fruit
{
public:
// enum class도 가능!
enum FruitType
{
APPLE, BANANA, CHERRY,
};
class InnerClass
{
};
struct InnerStruct
{
};
private:
FruitType m_type;
public:
Fruit(FruitType type) : m_type(type)
{}
FruitType getType() { return m_type; }
};
int main()
{
// enum class의 경우, Fruit::FruitType::APPLE
Fruit apple(Fruit::APPLE);
if (apple.getType() == Fruit::APPLE)
{
cout << "Apple" << endl;
}
return 0;
}
실행 시간 측정하기
실행 시간은 많은 요소에 인해 달라진다, 똑같은 프로그램이어도 하드웨어에 따라 다르고 그때그때 달라짐
여러 번 재기(적어도 세 번)
결론: 최적화는 힘들다
#include <iostream>
#include <vector>
#include <algorithm>
#include <random>
#include <chrono> // 시간
using namespace std;
class Timer
{
using clock_t = std::chrono::high_resolution_clock;
using second_t = std::chrono::duration<double, std::ratio<1>>;
std::chrono::time_point<clock_t> start_time = clock_t::now(); // 시작 시간, Timer가 만들어지는 순간
public:
void elapsed()
{
std::chrono::time_point<clock_t> end_time = clock_t::now(); // 끝나는 시간
// 끝나는 시간 - 시작 시간을 초로 변환해서 출력
cout << std::chrono::duration_cast<second_t>(end_time - start_time).count() << endl;
}
};
int main()
{
random_device rnd_device;
mt19937 mersenne_engine{ rnd_device() };
vector<int> vec(100000);
for (unsigned int i = 0; i < vec.size(); i++)
vec[i] = i;
// vector를 shuffle
std::shuffle(begin(vec), end(vec), mersenne_engine);
//for (auto &e : vec) cout << e << " ";
//cout << endl;
Timer timer;
std::sort(begin(vec), end(vec));
// 잰 시간을 출력
timer.elapsed();
//for (auto &e : vec) cout << e << " ";
//cout << endl;
return 0;
}
해당 포스트는 '홍정모의 따라하며 배우는 C++' 강의를 수강하며 개인 백업용으로 메모하였습니다.
인프런: https://www.inflearn.com/course/following-c-plus
홍정모의 따라하며 배우는 C++ - 인프런
만약 C++를 쉽게 배울 수 있다면 배우지 않을 이유가 있을까요? 성공한 프로그래머로써의 경력을 꿈꾸지만 지금은 당장 하루하루 마음이 초조할 뿐인 입문자 분들을 돕기 위해 친절하고 자세하게 설명해드리는 강의입니다. 초보로 시작하더라도 중급을 넘어 고급 프로그래머로 가는 길목에 들어서고 싶으시다면 최고의 디딤돌이 되어드리겠습니다. 여러분의 꿈을 응원합니다! 초급 프로그래밍 언어 C++ 온라인 강의 C++
www.inflearn.com